|
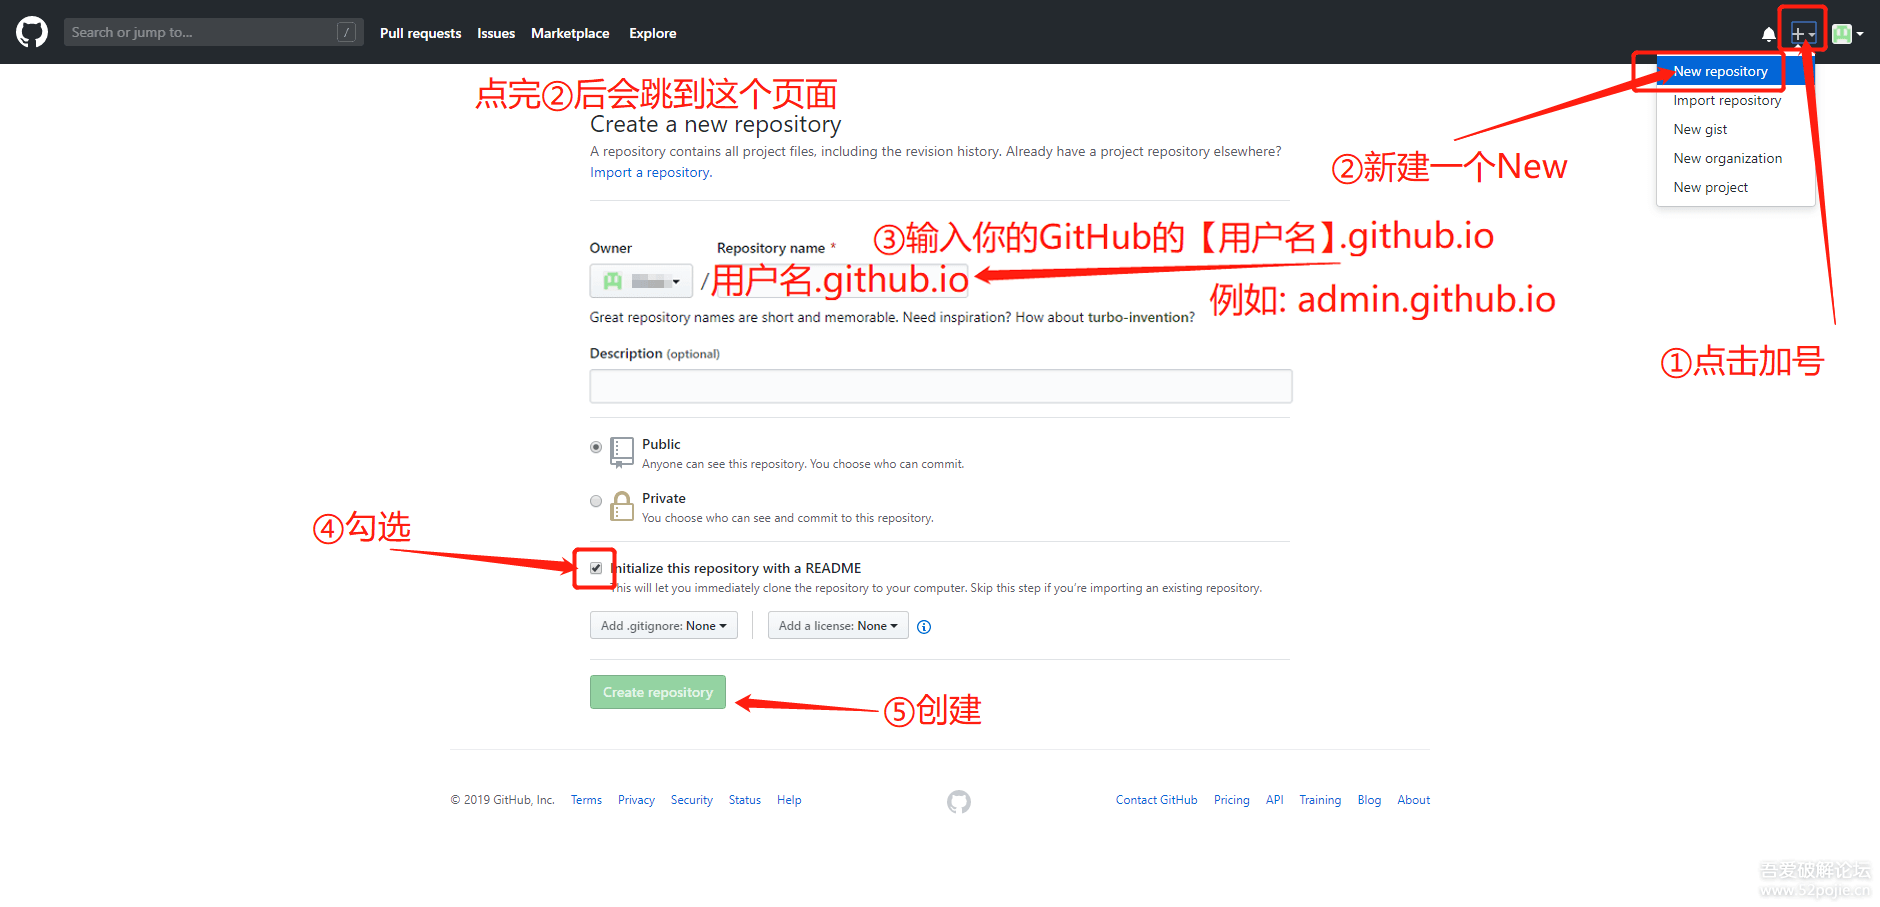
(此项目仅支持静态网页 不支持php 亲测)如图所示点击加号新建一个项目,然后填写 xxx.github.ip 为项目名 xxx表示你的账号 别填错了,乱填也无法开通。 必须是public属性,勾选readme 最后点创建
在项目里新建index.html文件 和CNAM文件 按图示新建即可
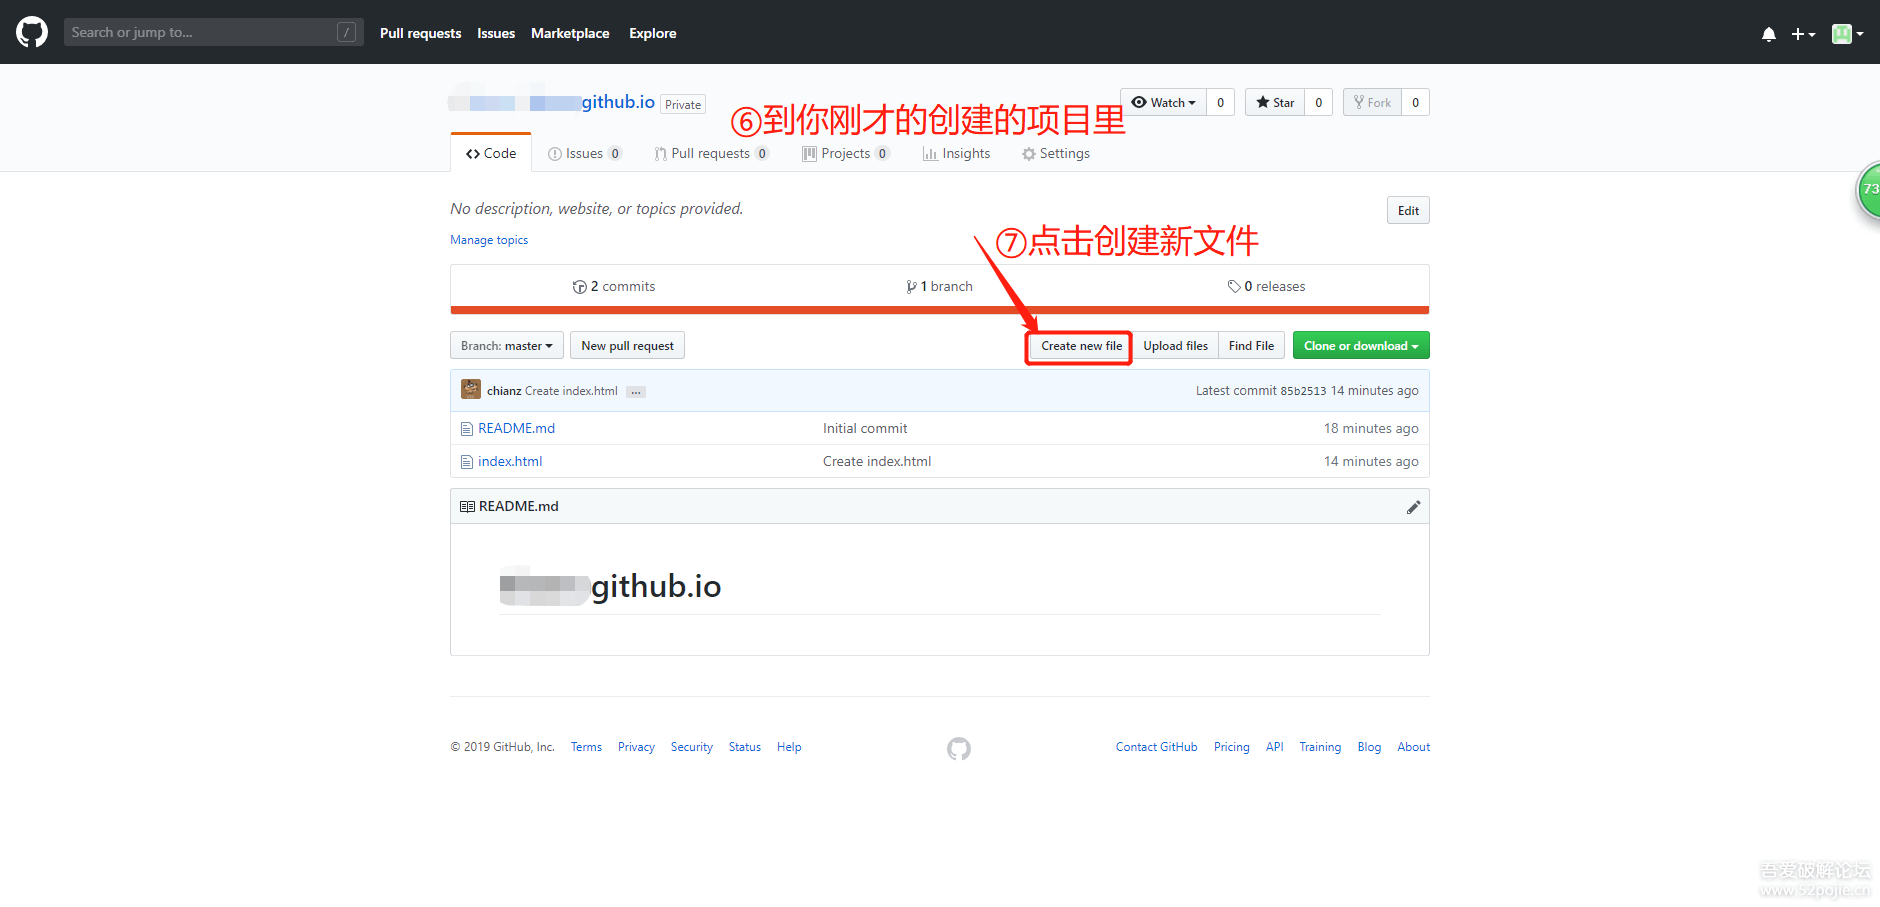

为保能快速开通 建议加上CNAM 如果不知道怎么做就按照新建index那样新建一个文件CNAM 注意大小写 内容填写 #www.baidu.com 或 留空即可
有个致命缺陷就是你的代码是可以被任何人更改的,如果不知道样子的可以看下下方开源链接 里的 index.html CNAM 这2个文件即可(别的文件夹是用来测试的,你可以任意编辑和新建 这个是没有权限限制的)
https://github.com/ithere/ithere.github.io
-----------------------------------github pages创建到此结束---------------------------------------
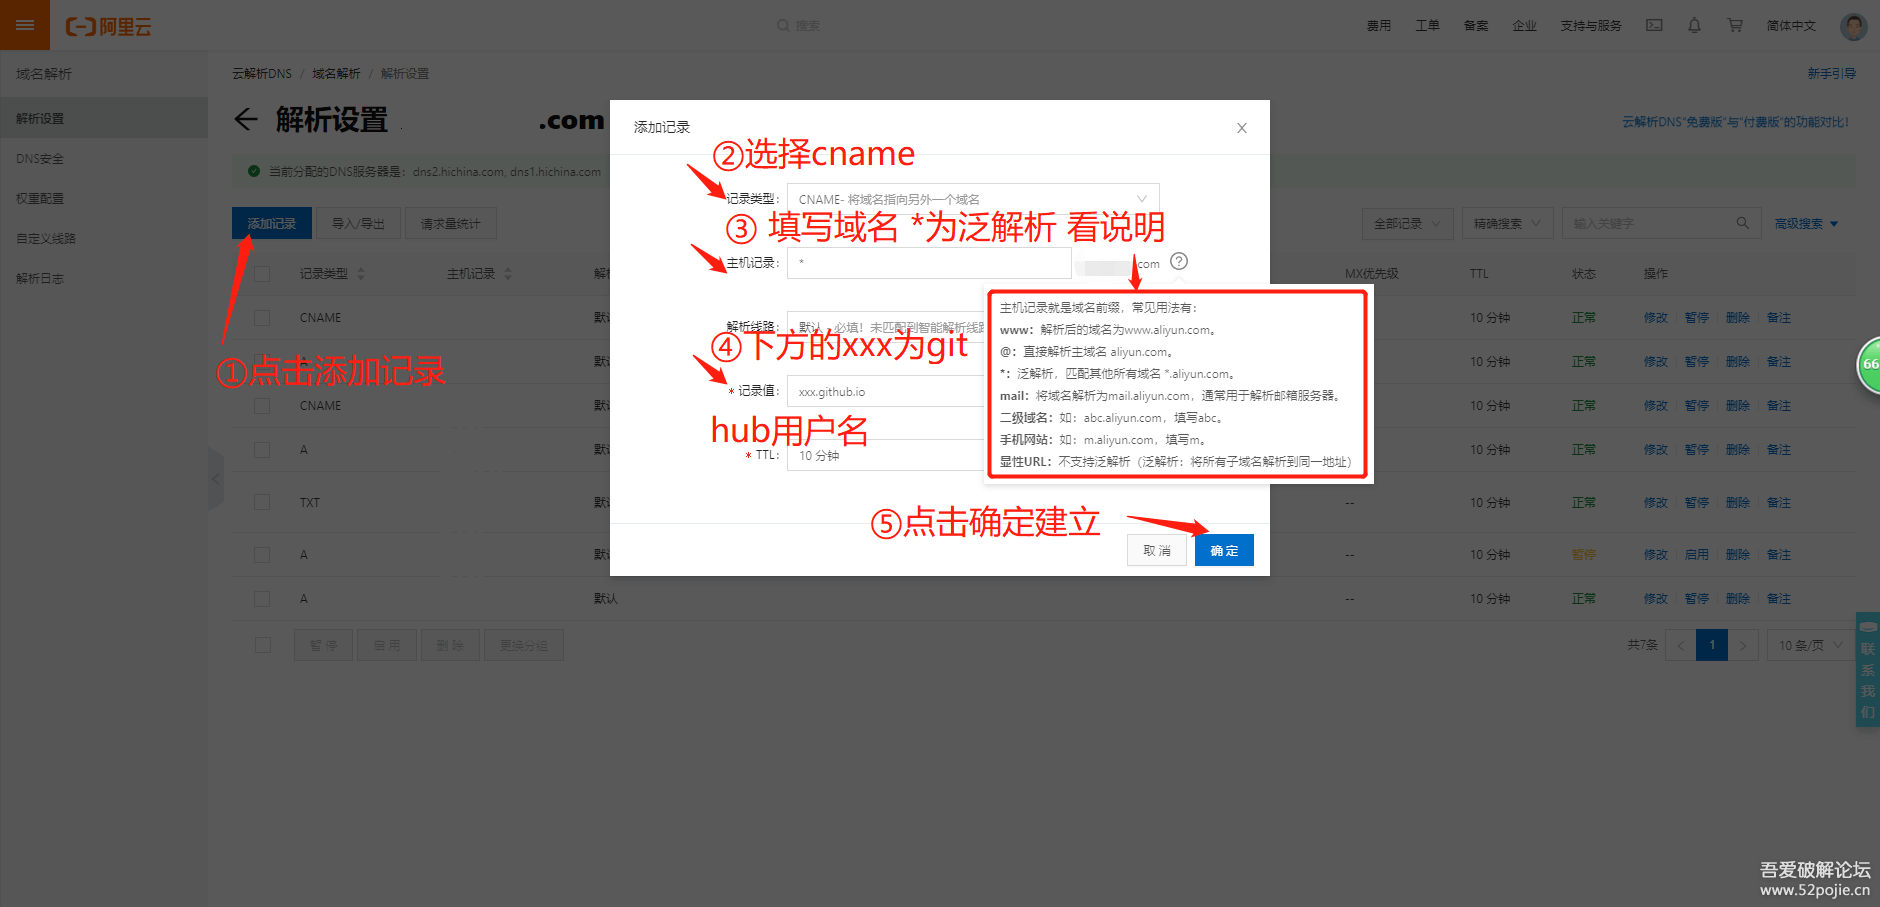
★下图为绑定你自己的域名到github二级域名上。以阿里云域名为例,进入控制台中的域名–解析 按图新增即可。然后访问你的域名即可直接访问github上设置的index.html 页面
最后补上开通后的效果地址
https://ithere.github.io/ |


文章评论